Raspberry Pi adventure day part 1 - setting up
Last week I got a gift in the post. I love getting post, regardless of how underwhelming the content but this was extremely exciting - I opened this jiffy to find a Raspberry Pi Zero!
Sunday 4 March 2018 was the day I plugged it in and turned it on.
Historically, I have not played much with computers, electronics or soldering irons but in recent years I’ve become more and more drawn to programming and last year I decided to finally act on my desire to learn to be a developer. This led me down a path along which, amongst huge amounts of excitement last May, I discovered Raspberry Pi. Then, about a month ago, a Raspberry Pi surprise gift package turned up in the post. Although my first foray did not go as exactly as expected - I did not solder the header onto my Raspberry Pi and create a robot worthy of fame and fortune on YouTube or even write a python program - I did manage to transform it into a server, use Jekyll to convert my GitHub Pages website files into HTML and CSS and transfer them onto the Raspberry Pi and then view the site over the RP’s network.
You need to plug it in
So, first things first, I needed to figure out how to set it up - we don’t all know that Raspberry Pi’s need to be plugged in. I took all the parts, laid them out and figured out what they were.
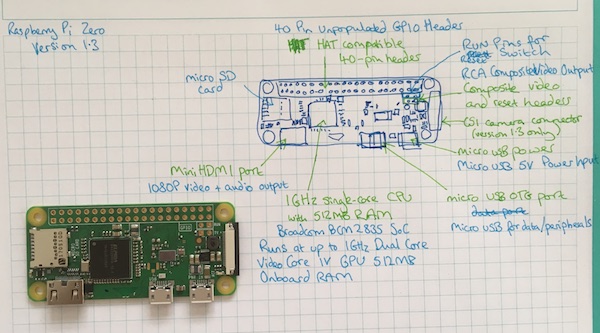
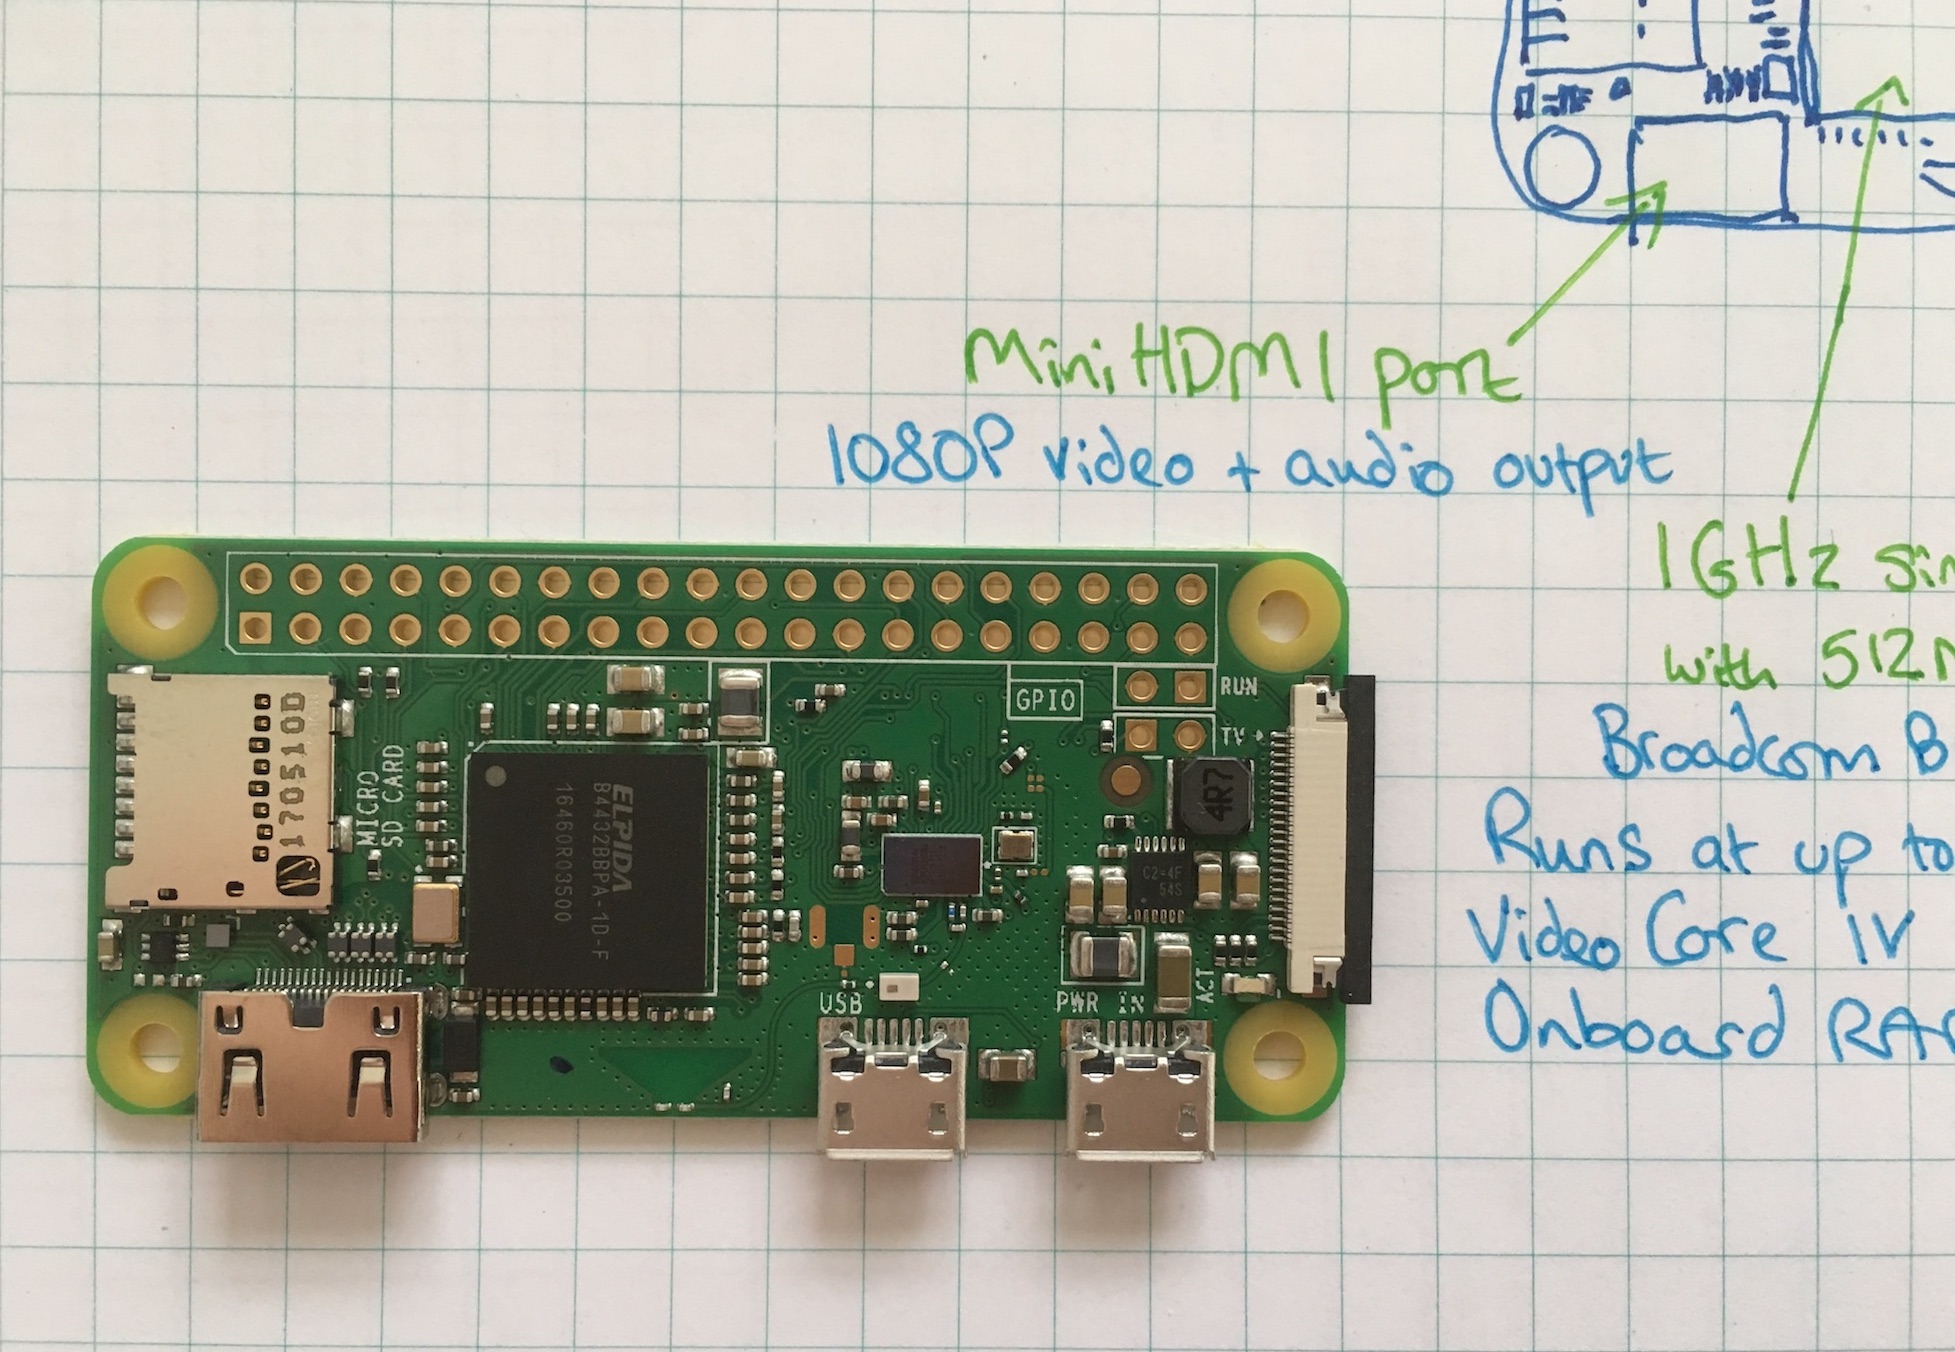
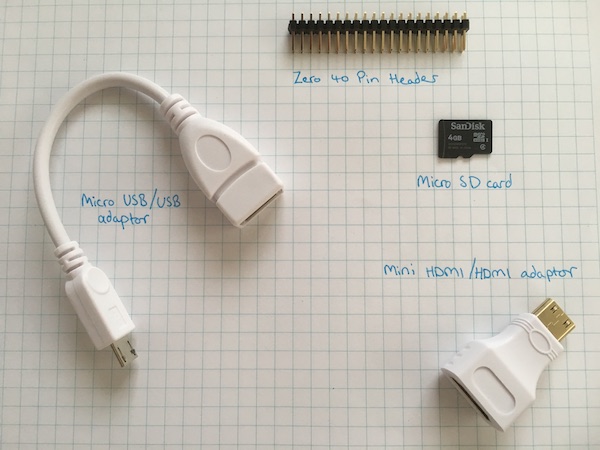
The Raspberry Pi Zero specifications can be found on the Raspberry Pi website. In my surprise package I also recieved: a Zero 40 Pin Header, aMicro USB/USB adaptor, aMini HDMI/HDMI adaptor and a Micro SD card 4gb.
I inserted the SD card, attached the micro usb adaptor to the USB on my keyboard and the micro HDMI cable to the HDMI on my TV monitor, switched the TV on and turned it to HDMI2. It was only then that I figured out that I had to plug the Raspberry pi into a power source! So, I hunted down a micro USB power cable and plugged that in too. This pdf was very useful when I was setting it all up.
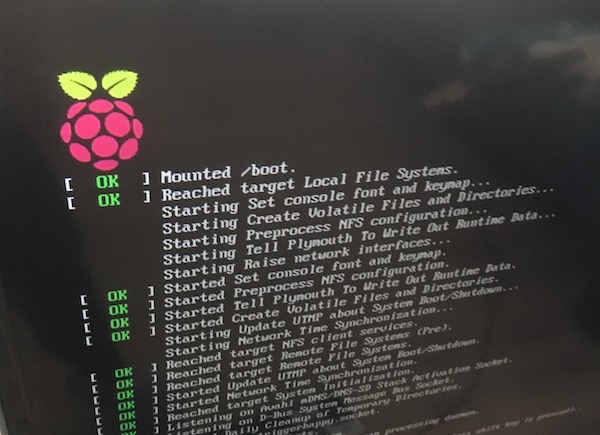
The Raspberry Pi booted up
The screen flickered to life and the Raspberry Pi started to boot up. The pre-installed operating system on my SD card is Linux which uses bash so it is very similar to the command line on my mac which made using it a lot simpler. When the RP had finished booting it asked me for the default user id and password. These can be found on the Raspberry Pi documentation for Linux.
Initially, I had been set the challenge of getting a python programme up and running on the RP which comes with Python already installed on it. I had a little play with that and then found that there are also pre-installed python games on there too. However, as I had just created a new website on Github pages, I decided I would try to get my site onto my RP instead and leave python programming and gaming for another Sunday in.
So, the next step was to try to connect the RP to wifi which turned out to be very simple following the documentation on the Raspberry Pi site.
I installed Apache - an http server - which initially failed to install and I had no idea why. Yet another example of the multitude of times where having the help of a professional programmer proved invaluable! They recommended that I check whether there were any updates for the system’s package index files:
pi@raspberrypi:~ $ sudo apt-get update
Running this update command fetches packages from their locations and updates them if there is a newer version. When I tried to install Apache again it ran fine. Installing Apache creates an html folder, ‘index.html’, in the /var/www/html folder of the RP which you can delete, edit or replace and I wanted to send a file to my RP to replace this website holder.
In part 2 I will write about how I used Jekyll to produce HTML and CSS files from my GitHub Pages markdown files and then transferred the files onto the Raspberry Pi to view my website.