Creating a website contact page part 2 - simple HTTP request example
In part 1 of ‘Creating a website contact page’ I discovered that in order to submit the information entered in the contact form, stored on Amazon S3, I need to create a different server to handle POST requests
The second in my series of HTTP request articles walks through how to build a very simple example of an HTTP request to get a better understanding of how they work.
Other HTTP series posts:
-
What is an HTTP request and how do basic HTTP requests work?
-
Building a server to deal with my contact form - coming soon
-
Serverless - another way to solve the contact form problem. - coming soon
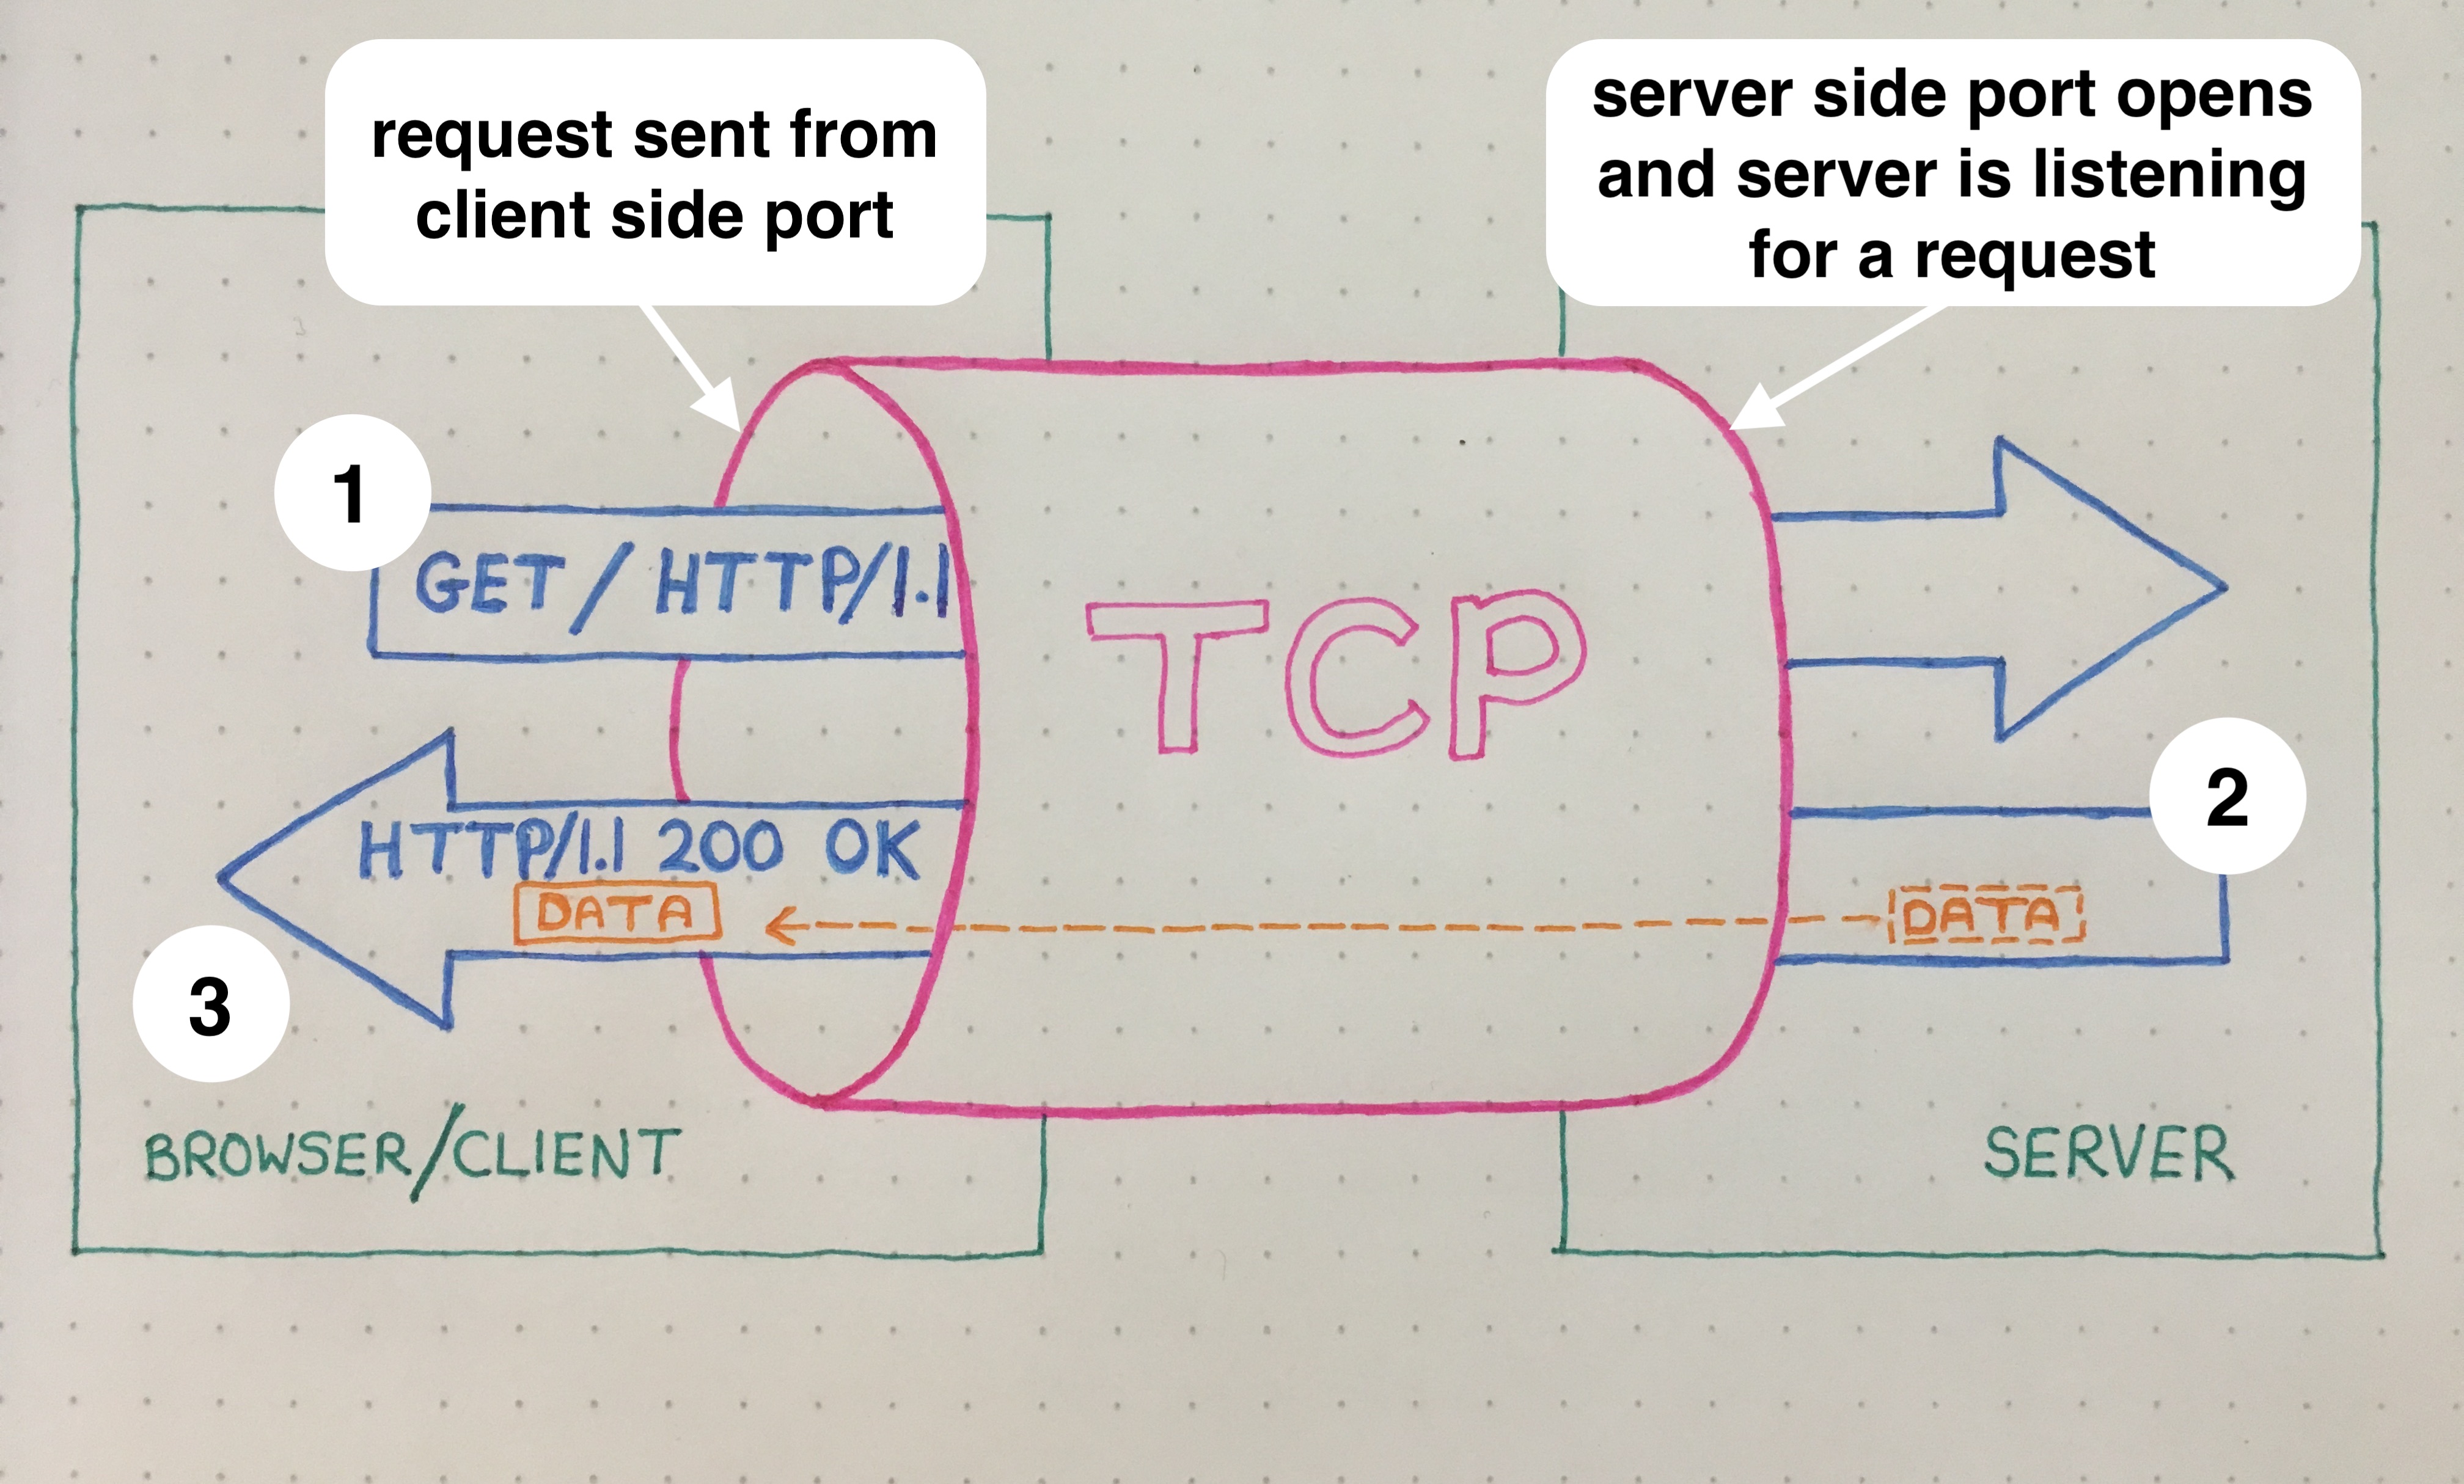
Quick recap
So, to quickly recap on how basic HTTP requests work; HTTP GET requests aquire data from the server and send it back to the browser/client:
-
A client (browser) submits an HTTP request for a resource (data) to a server (GET/ HTTP/1.1) over a TCP connection
-
The server returns a response to the client
-
The response contains status information about the request and may contain the requested content. Assuming the data request is successful it responds with a message to say “I understand, here is your requested data” (HTTP/1.1 200 OK) along with the requested data.
Creating a virtual environment and installing Flask
In order to build an example of an HTTP request it is a good idea to create an isolated Python development environment to work in. This will keep it separate from any other libraries already installed. The environment can then be kept for further development work or easily deleted. Creating this local environment is like a little bubble of programmes and files separated away from the rest of the computer.
I created a virtual environment using the ‘venv’ module and installed Flask, a microframework for Python which I used to facilitate HTTP requests.
Steps on the command line:
Navigate to where you want to create the directory:
me$ cd /Documents
Create a virtual environment (a directory) and give it a name e.g.’test-server’:
me$ python3 -m venv test-server
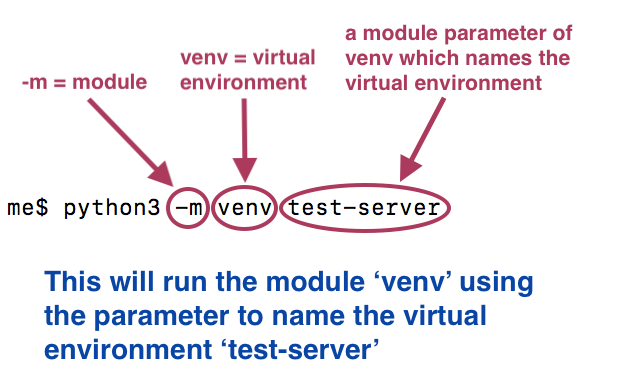
This runs the module ‘venv’ (virtual environment) with the parameter test-server, which creates a directory called ‘test-server’.
Then, to activate the virtual environment in the command line:
me$ source test-server/bin/activate
This changes the prompt to: (virtualenvironment-name) $

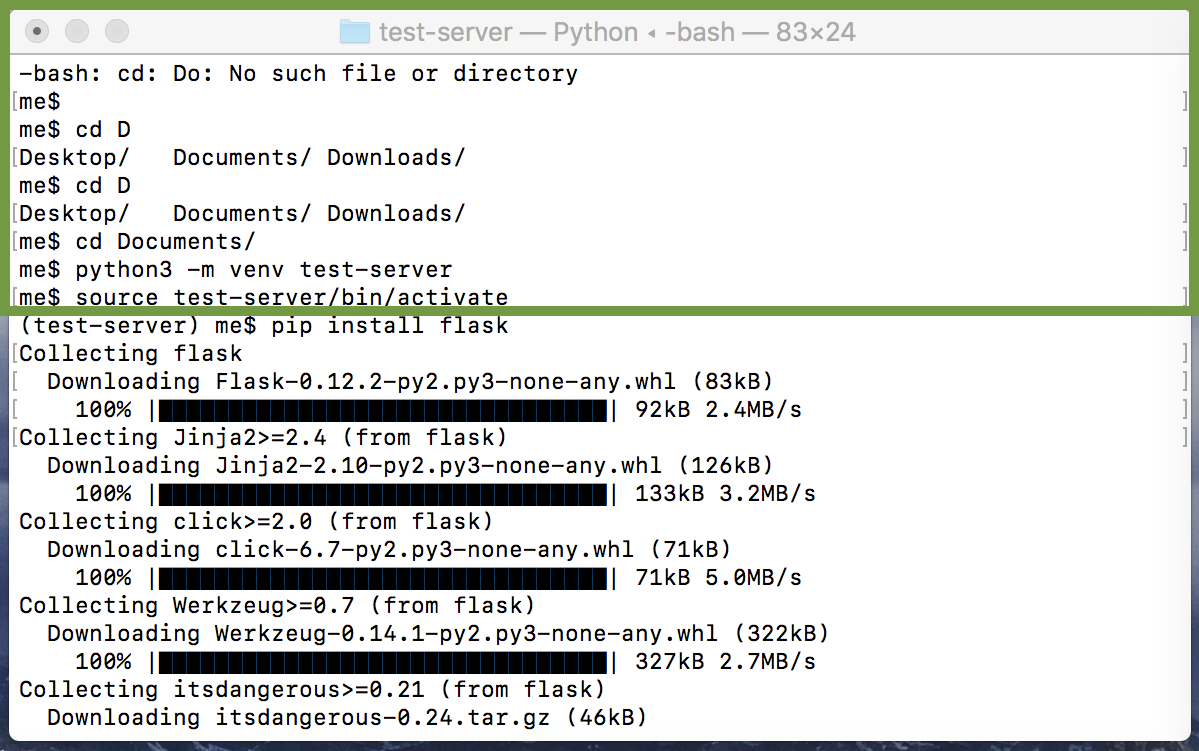
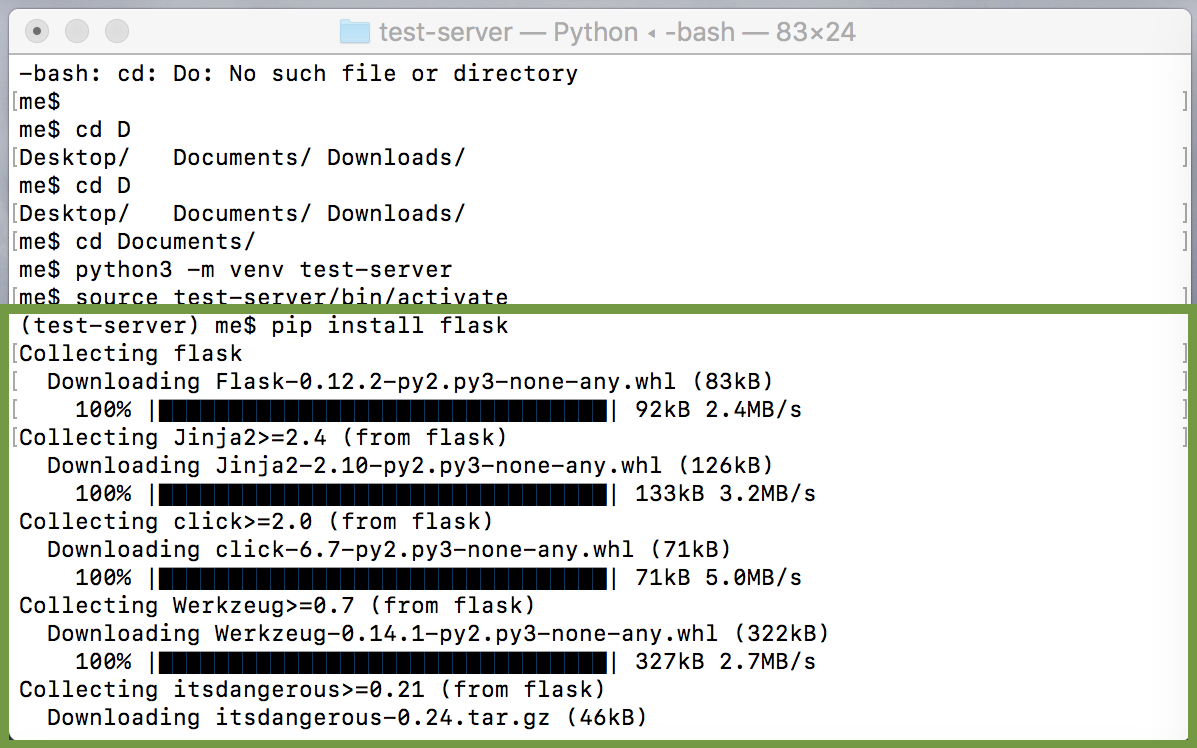
Then install Flask and all it’s dependencies within the virtual environment:
(test-server) $ pip install flask
Using Flask
To set up Flask simply follow these steps which can be found on the Flask site:
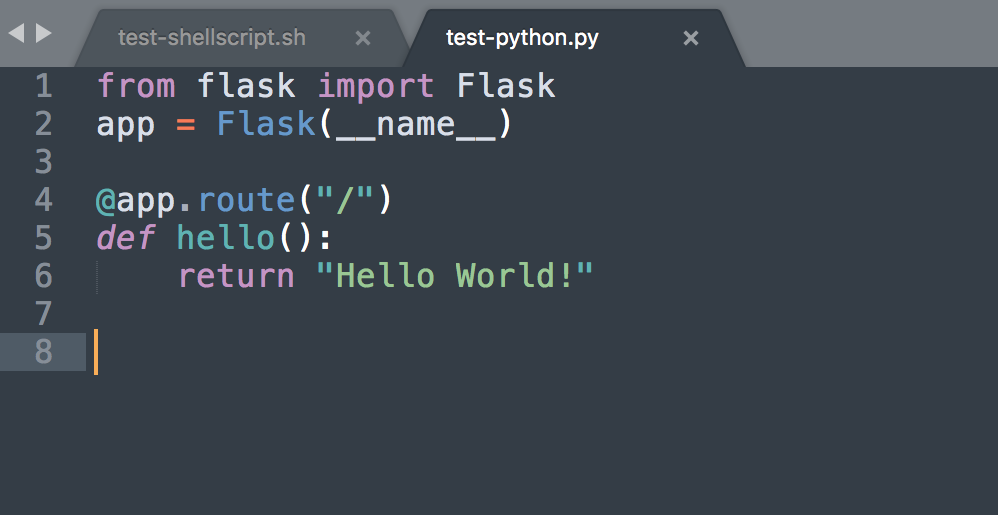
Firstly, create a Python file - I called mine test-python.py - containing the following:
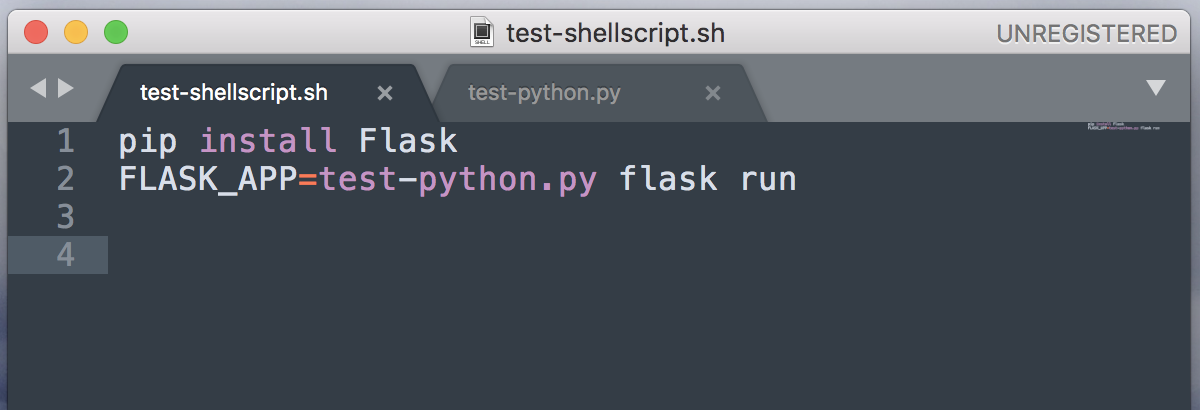
Then create a file containing shell script - I called mine test-shellscsript.sh - containing the file name for your Python file:
Opening a port to listen for an HTTP request
In order for our application to be able to listen for an HTTP request it needs to be bound to an open port. The next steps are how I did this.
Making sure you are in the test-server directory, run the shell script file:
(test-server) me$ cd test-server
(test-server) me$ test-shellscript.sh
The first time I did this it came back with an error:
-bash: test-shellscript.sh: command not found
This is something I am getting familiar with now and it is often caused by file permissions. I checked the permissions of the files within the test-server directory to see if the shell file was executable:
(test-server) me$ ls -al
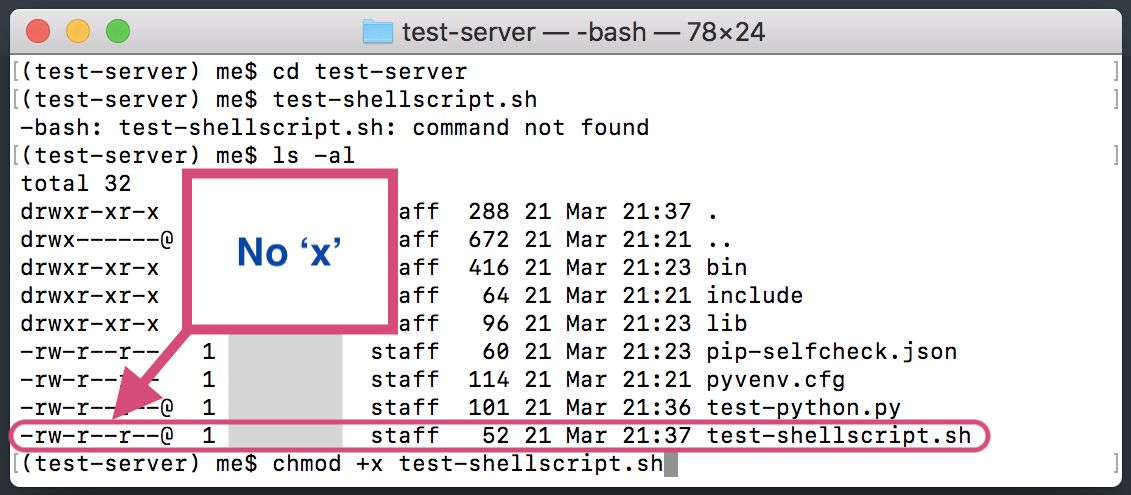
From the output for the test-shellscript.sh file you can see it is not executable as there would be an ‘x’ in the permissions.
In order to change the access permissions of the shell script file I ran this code:
(test-server) me$ chmod +x test-shellscript.sh
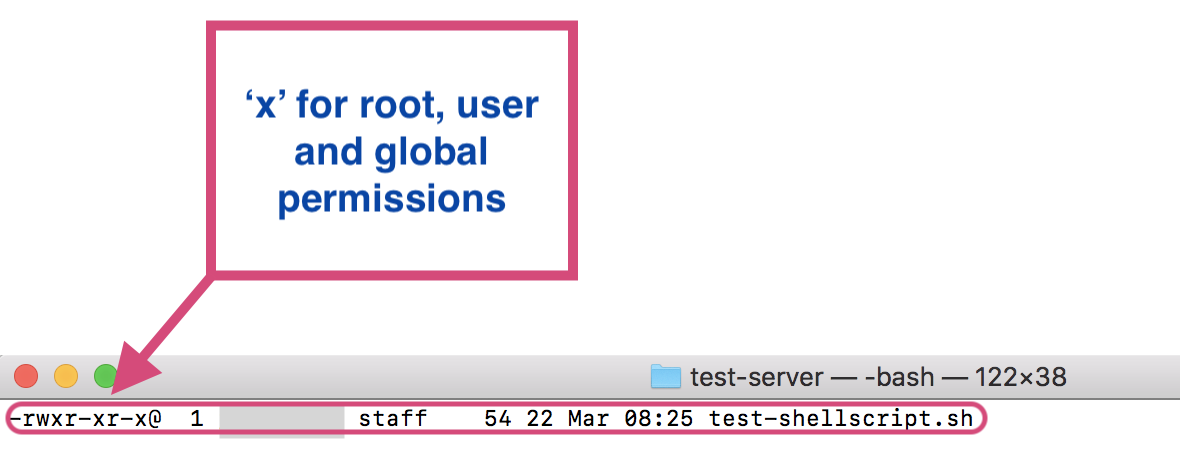
The output below now shows an ‘x’ for root, user and global permissions, meaning they are all executable:
I ran the file again but got the same error!:
(test-server) me$ test-shellscript.sh

-bash: test-shellscript.sh: command not found
The reason for this is that to run a programme in the shell it looks in the PATH for executables. For instance when you type the ‘ls’ command into bash it looks in the path of directories, finds the programme called ‘ls’ that lives in usr/bin and runs it. You can see the paths bash searches using the command:
echo $PATH
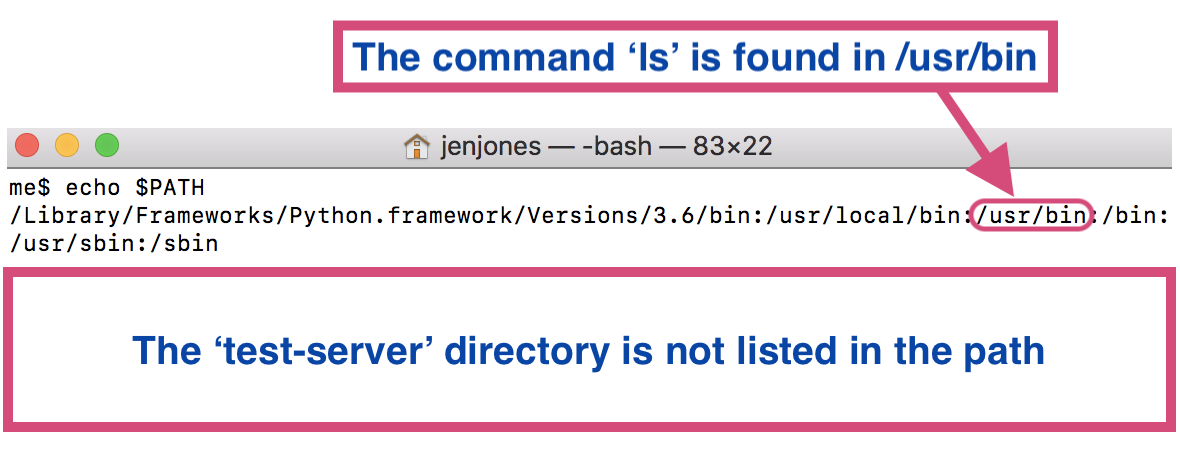
As you can see the virtual server directory (test-server) is not listed in PATH. Unless I add the test-server directory to PATH or tell bash where to run the shell script from i.e. the test-server, it will come back with an error as bash will not be able to find it.
I chose to run the shell ‘test-shellscript.sh’ by telling bash where to find it i.e. the directory I am currently in. To do this I just added ‘./’ before the command:
(test-server) me$ ./test-shellscript.sh
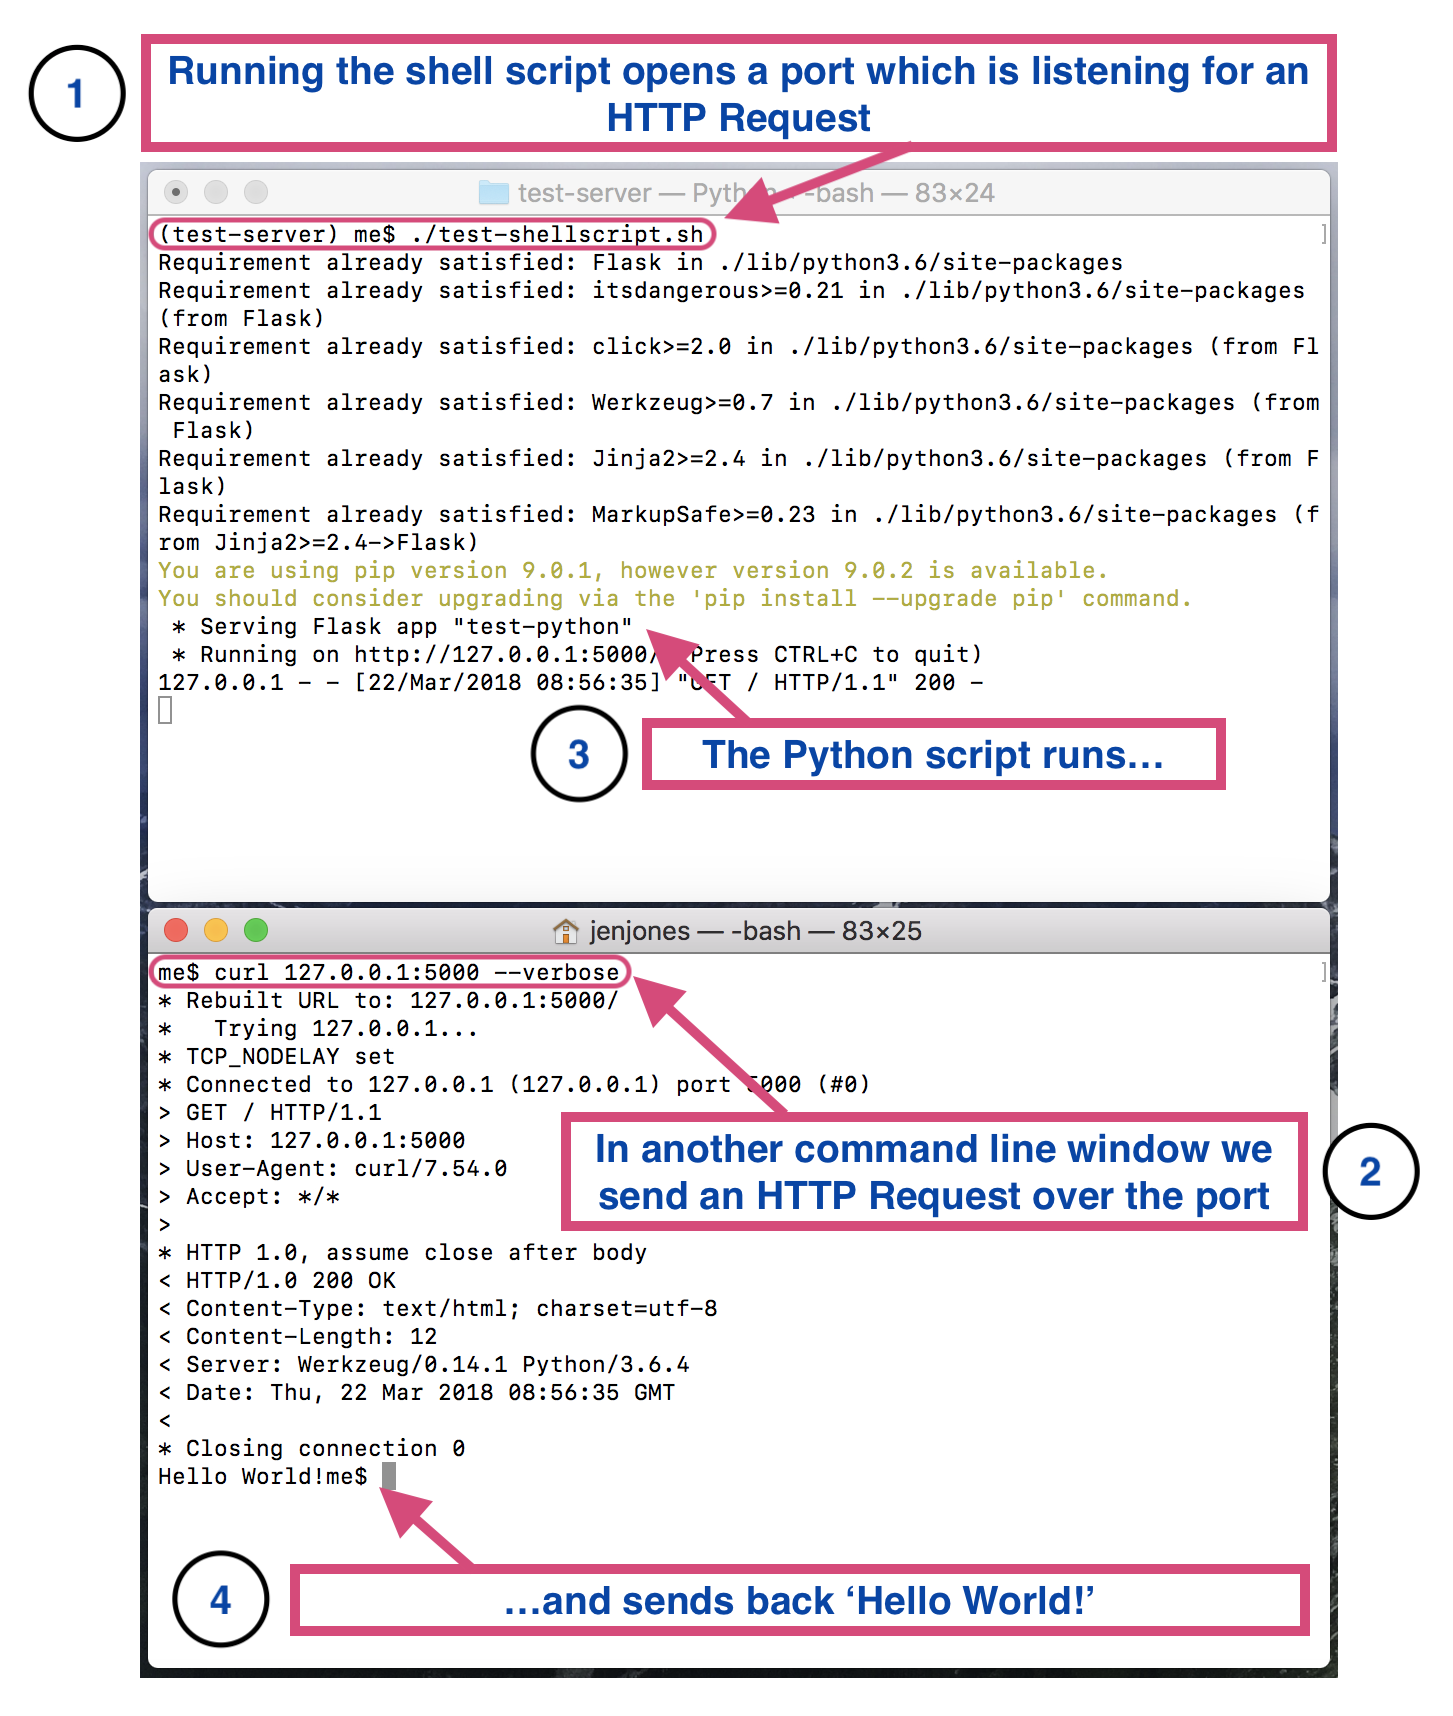
This time the shell script ran without any errors, executing the Python file and binding the application to a port. At this point the port is open, listening for an HTTP request.
Making an HTTP request using curl
The next step is to make an HTTP request using curl to the port in a new terminal window:
me$ curl 127.0.0.1:5000 --verbose
This sends an HTTP request over the port. The Python script runs and sends back “Hello World”.
This can be seen in the graphic below:
- Run the shell script. This opens a port and the server is ready and waiting for an HTTP request.
- In another bash window (representing the client) we send an HTTP GET request to the open port using curl.
- The Python script is run on the server…
- …which sends over the ‘Hello World’ response.
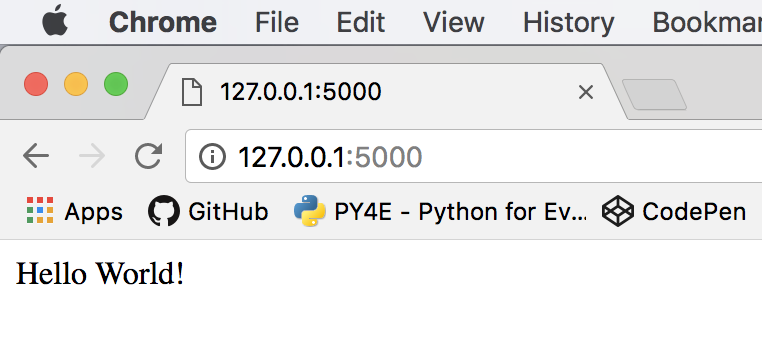
The result of the request can be seen more easily in a browser using the IP address and port:
My next HTTP post will walk through how I built a server to deal with my contact form.